

1. Prepare the example template
Use the same environment and AdUnit ID that returned an HTTP200 ad response in the Quickstart. Prepare a web browser and Python 3. Ad requests and click delivery do not require an access token.
Create a folder for the example file.
~/a2-banner-example/banner-ad.html using your text editor.
View and copy the HTML template
View and copy the HTML template
banner-ad.html
~/a2-banner-example folder containing the file. Port 9000 avoids a conflict with the A2 server.
2. Request and display the ad
Fill in the template’s fields and select Load ad once. You do not need to edit the HTML source.
Confirm
Ad request: HTTP 200, Rendering: complete, and the A2 banner. Expand Response JSON to inspect the complete response for this request.
This page requests a new ad. It stores the ext.ad_log from the ad response displayed on the page and sends it automatically when the banner is clicked. For HTTP 204, follow the Ad Serving Quickstart checklist.
This example uses the On Ad Response impression tracking configured in the Quickstart. Receiving a banner response records one more impression. Do not send an additional
imp event.3. Send the click event
Click the displayed banner once. Confirm thatexample.com opens in a new tab and the exercise page shows Click delivery: HTTP 200 — check metrics.
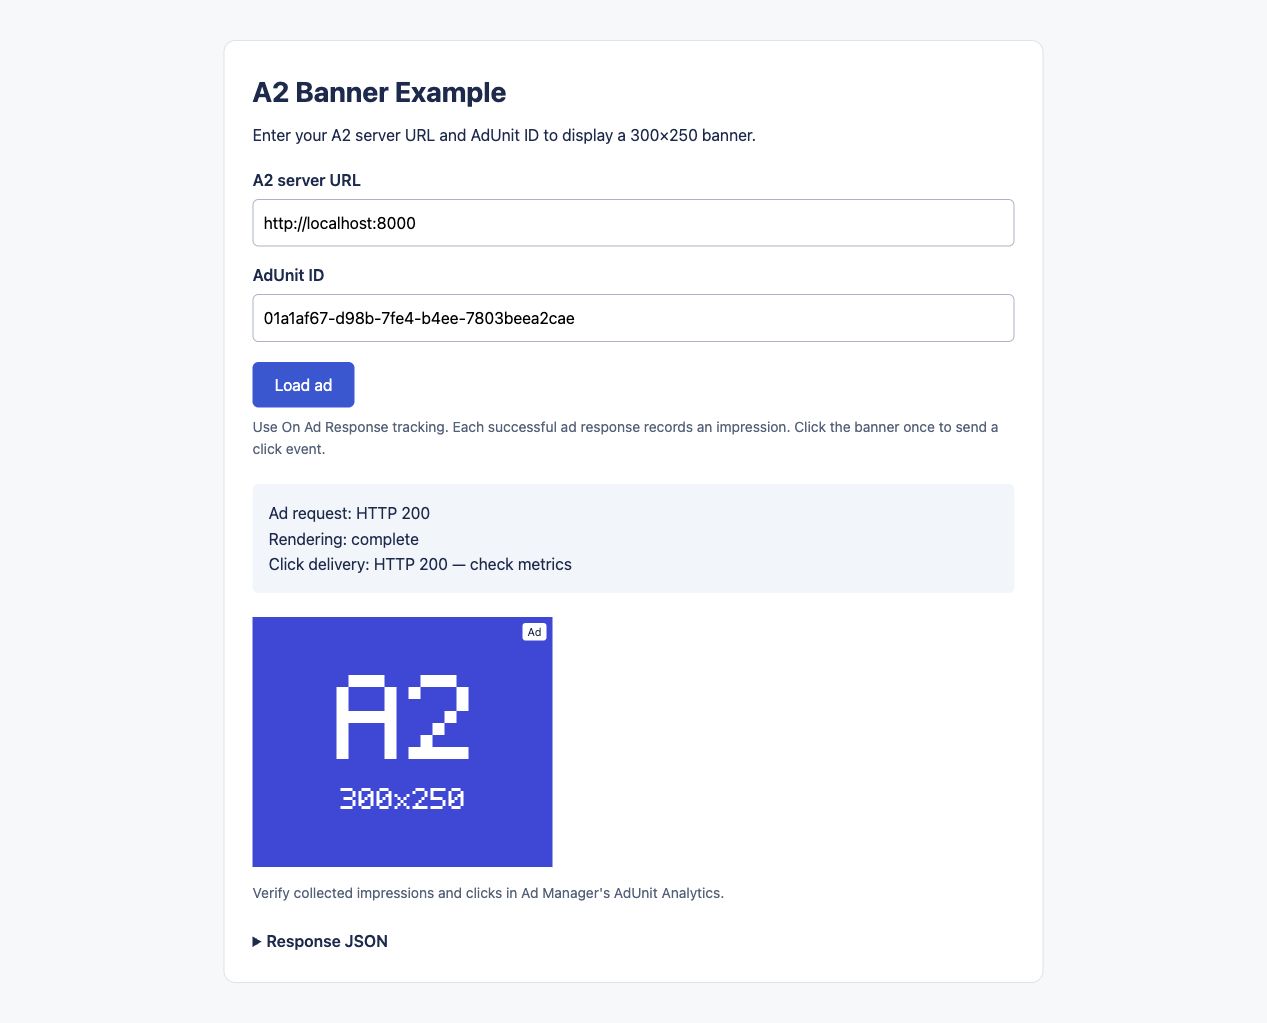
The shared template after entering the server URL and AdUnit ID and verifying banner rendering and click delivery.
POST /dmp/v0/log with that ad’s ad_log. The page has already sent it; do not send it again from the terminal.
Body sent on click
200 does not guarantee collection or aggregation, so continue through the metrics check.
4. Verify recorded impressions and clicks
1
Open AdUnit Analytics
In Ad Manager, go to Analytics > Inventory Analytics > AdUnit Analytics.
2
Select the exercise AdUnit and period
Search using the copied AdUnit ID to find
Quickstart banner. Include the exercise date in the query period. Align dates to Asia/Seoul when comparing with the console.3
Compare with expected counts
Compare impressions and clicks with the table below. Aggregation can be delayed, so reload the page later. Do not request another ad or resend clicks merely to check metrics.
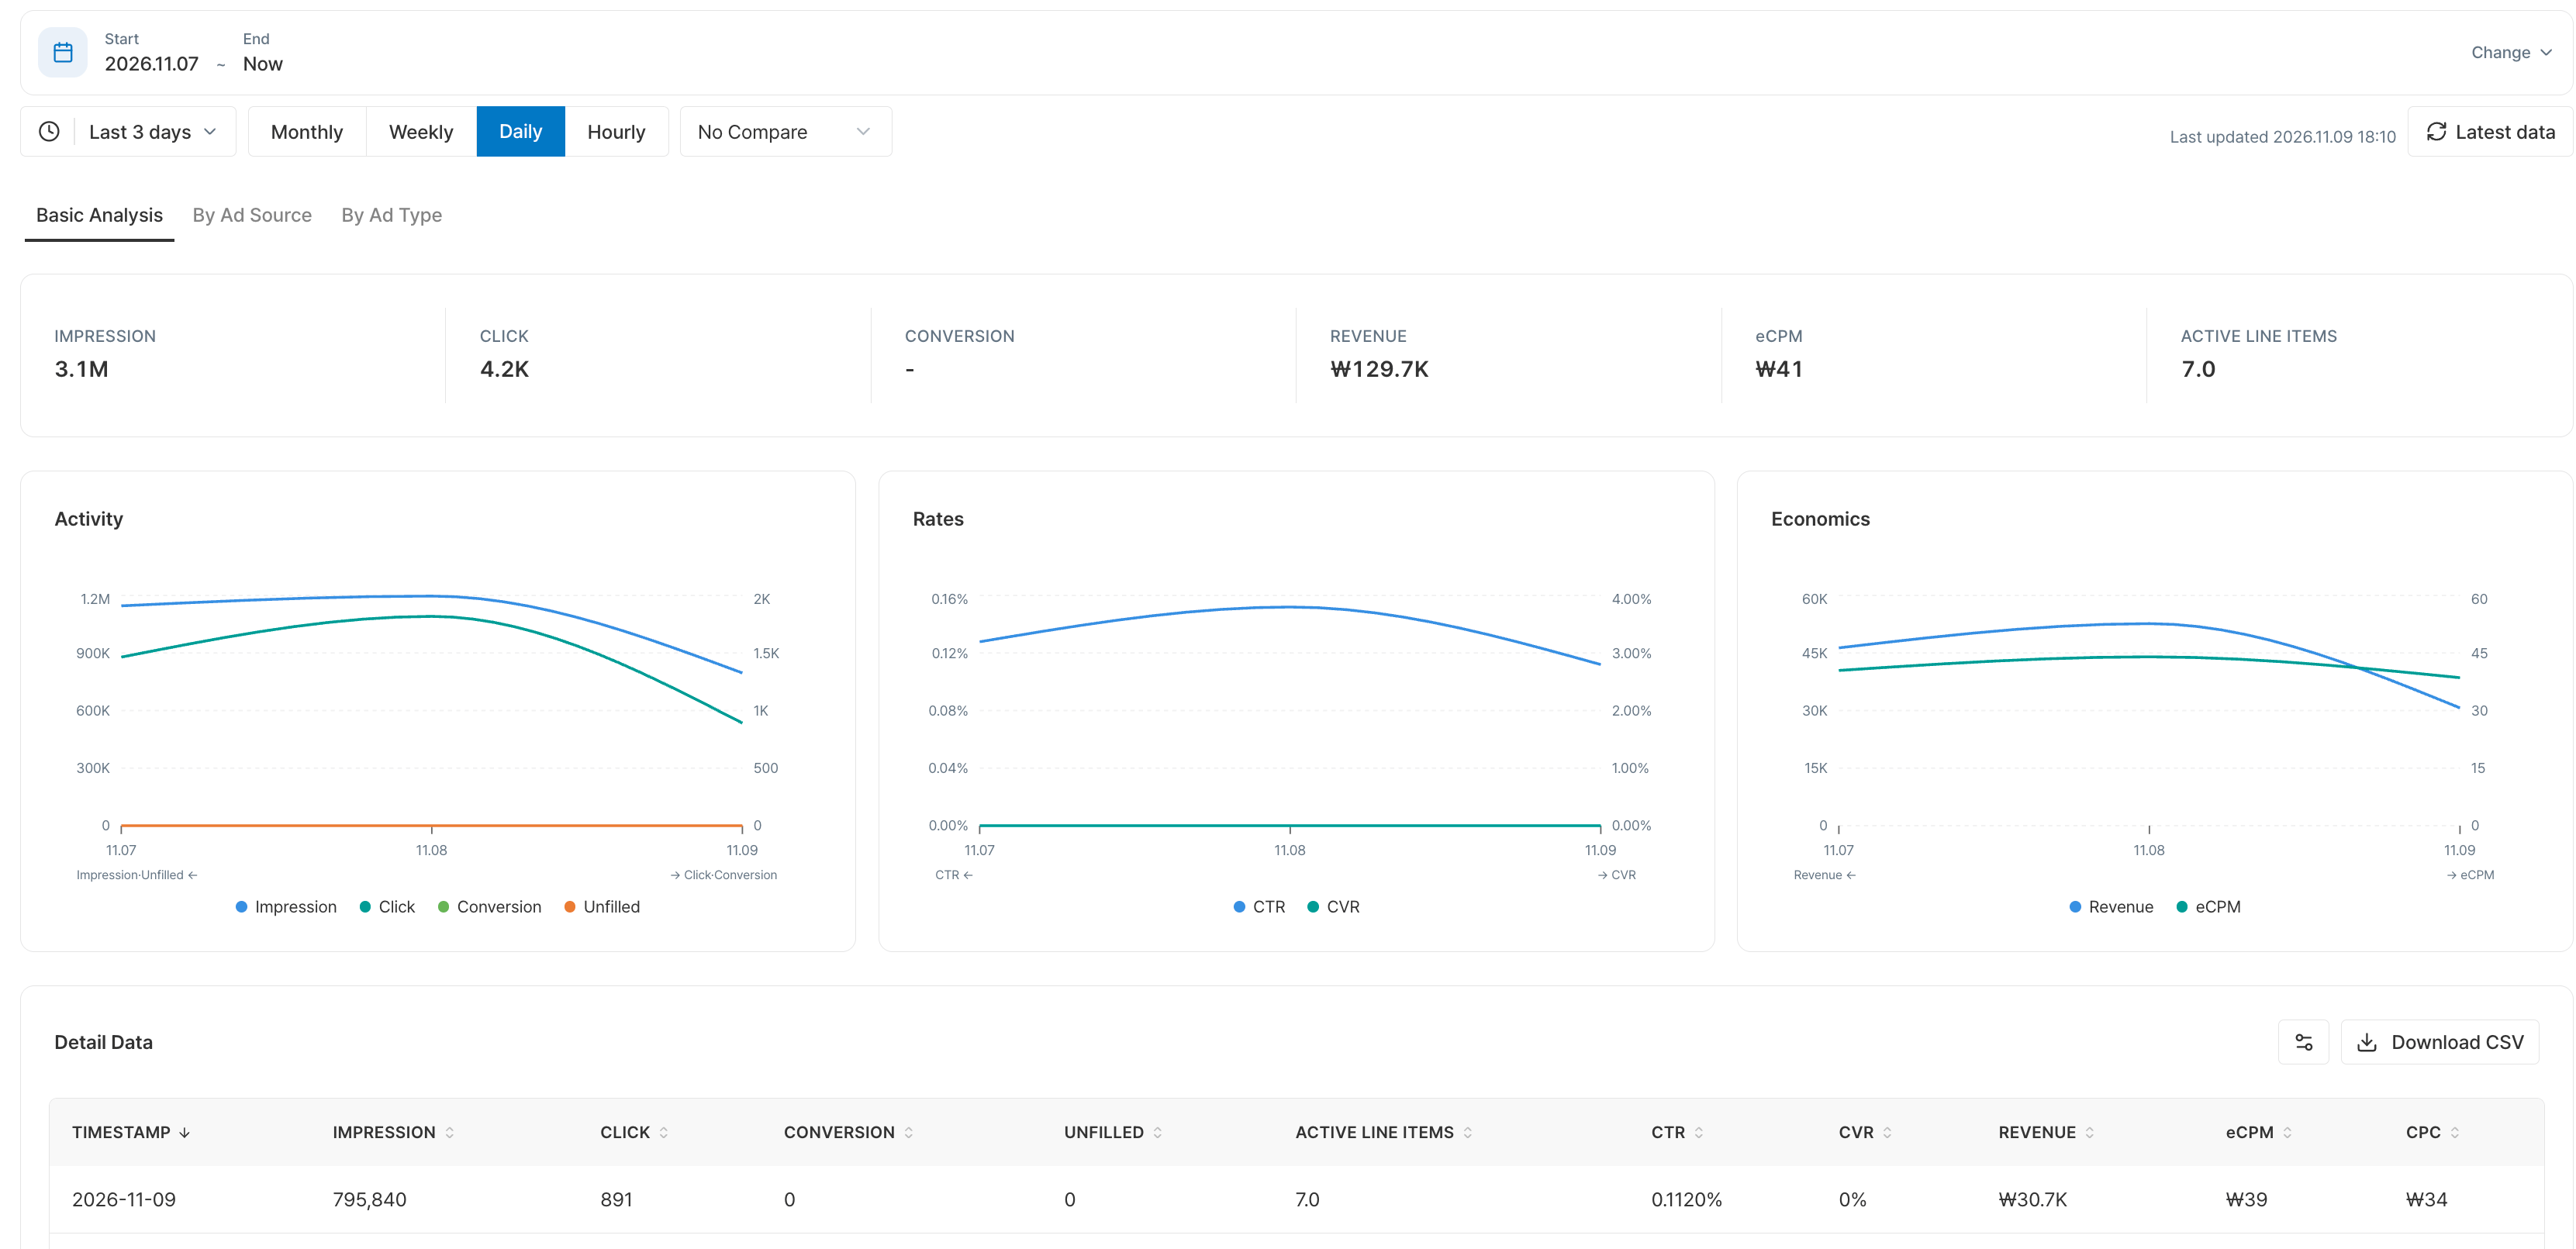
The Basic Analysis view of an ad unit in AdUnit Analytics. Check the date range and impression and click counts. Values shown are examples.
If you made extra requests or reloaded the page and loaded another ad, add each successful banner response to the expected impression count. If other traffic reached the AdUnit, compare all request records for the same AdUnit and period.
Completion criteria
- The banner response contains an image, landing URL, and
ext.ad_log. - The page displays the banner, and clicking opens the landing page.
- You have checked the click request and HTTP response.
- You have verified actual impression and click aggregates in AdUnit Analytics.
Troubleshooting
Requests succeed in the terminal but fail in the browser
Requests succeed in the terminal but fail in the browser
Check the server URL, then inspect HTTPS, CORS, and preflight errors in the browser’s Network and Console tabs. The API must allow requests from
http://localhost:9000; duplicate Access-Control-Allow-Origin headers cause the browser to block the response.Click counts do not increase
Click counts do not increase
Check click delivery results, the query period, and AdUnit ID. Network errors or timeouts do not prove processing failure; do not retry unconditionally.
Impressions or clicks exceed expectations
Impressions or clicks exceed expectations
Check repeated requests, loading another ad after a reload, multiple clicks, or other traffic.