> ## Documentation Index
> Fetch the complete documentation index at: https://docs.aiderx.io/llms.txt
> Use this file to discover all available pages before exploring further.
# Deploying A2 OnPrem to GCP
> This guide explains how to deploy A2 OnPrem to Google Cloud Platform (GCP).
This guide describes how to deploy A2 using Google Cloud Platform (GCP)'s Compute Engine.
### Setting up GCP Compute Engine
#### 1. Prerequisites
You need to set up a GCP project and enable the Compute Engine API. This process can be easily performed in the GCP console.
#### 2. Creating an Instance
1. Navigate to `Compute Engine` > `VM instances` menu.
2. Click the `CREATE INSTANCE` button.
3. Configure the following settings:
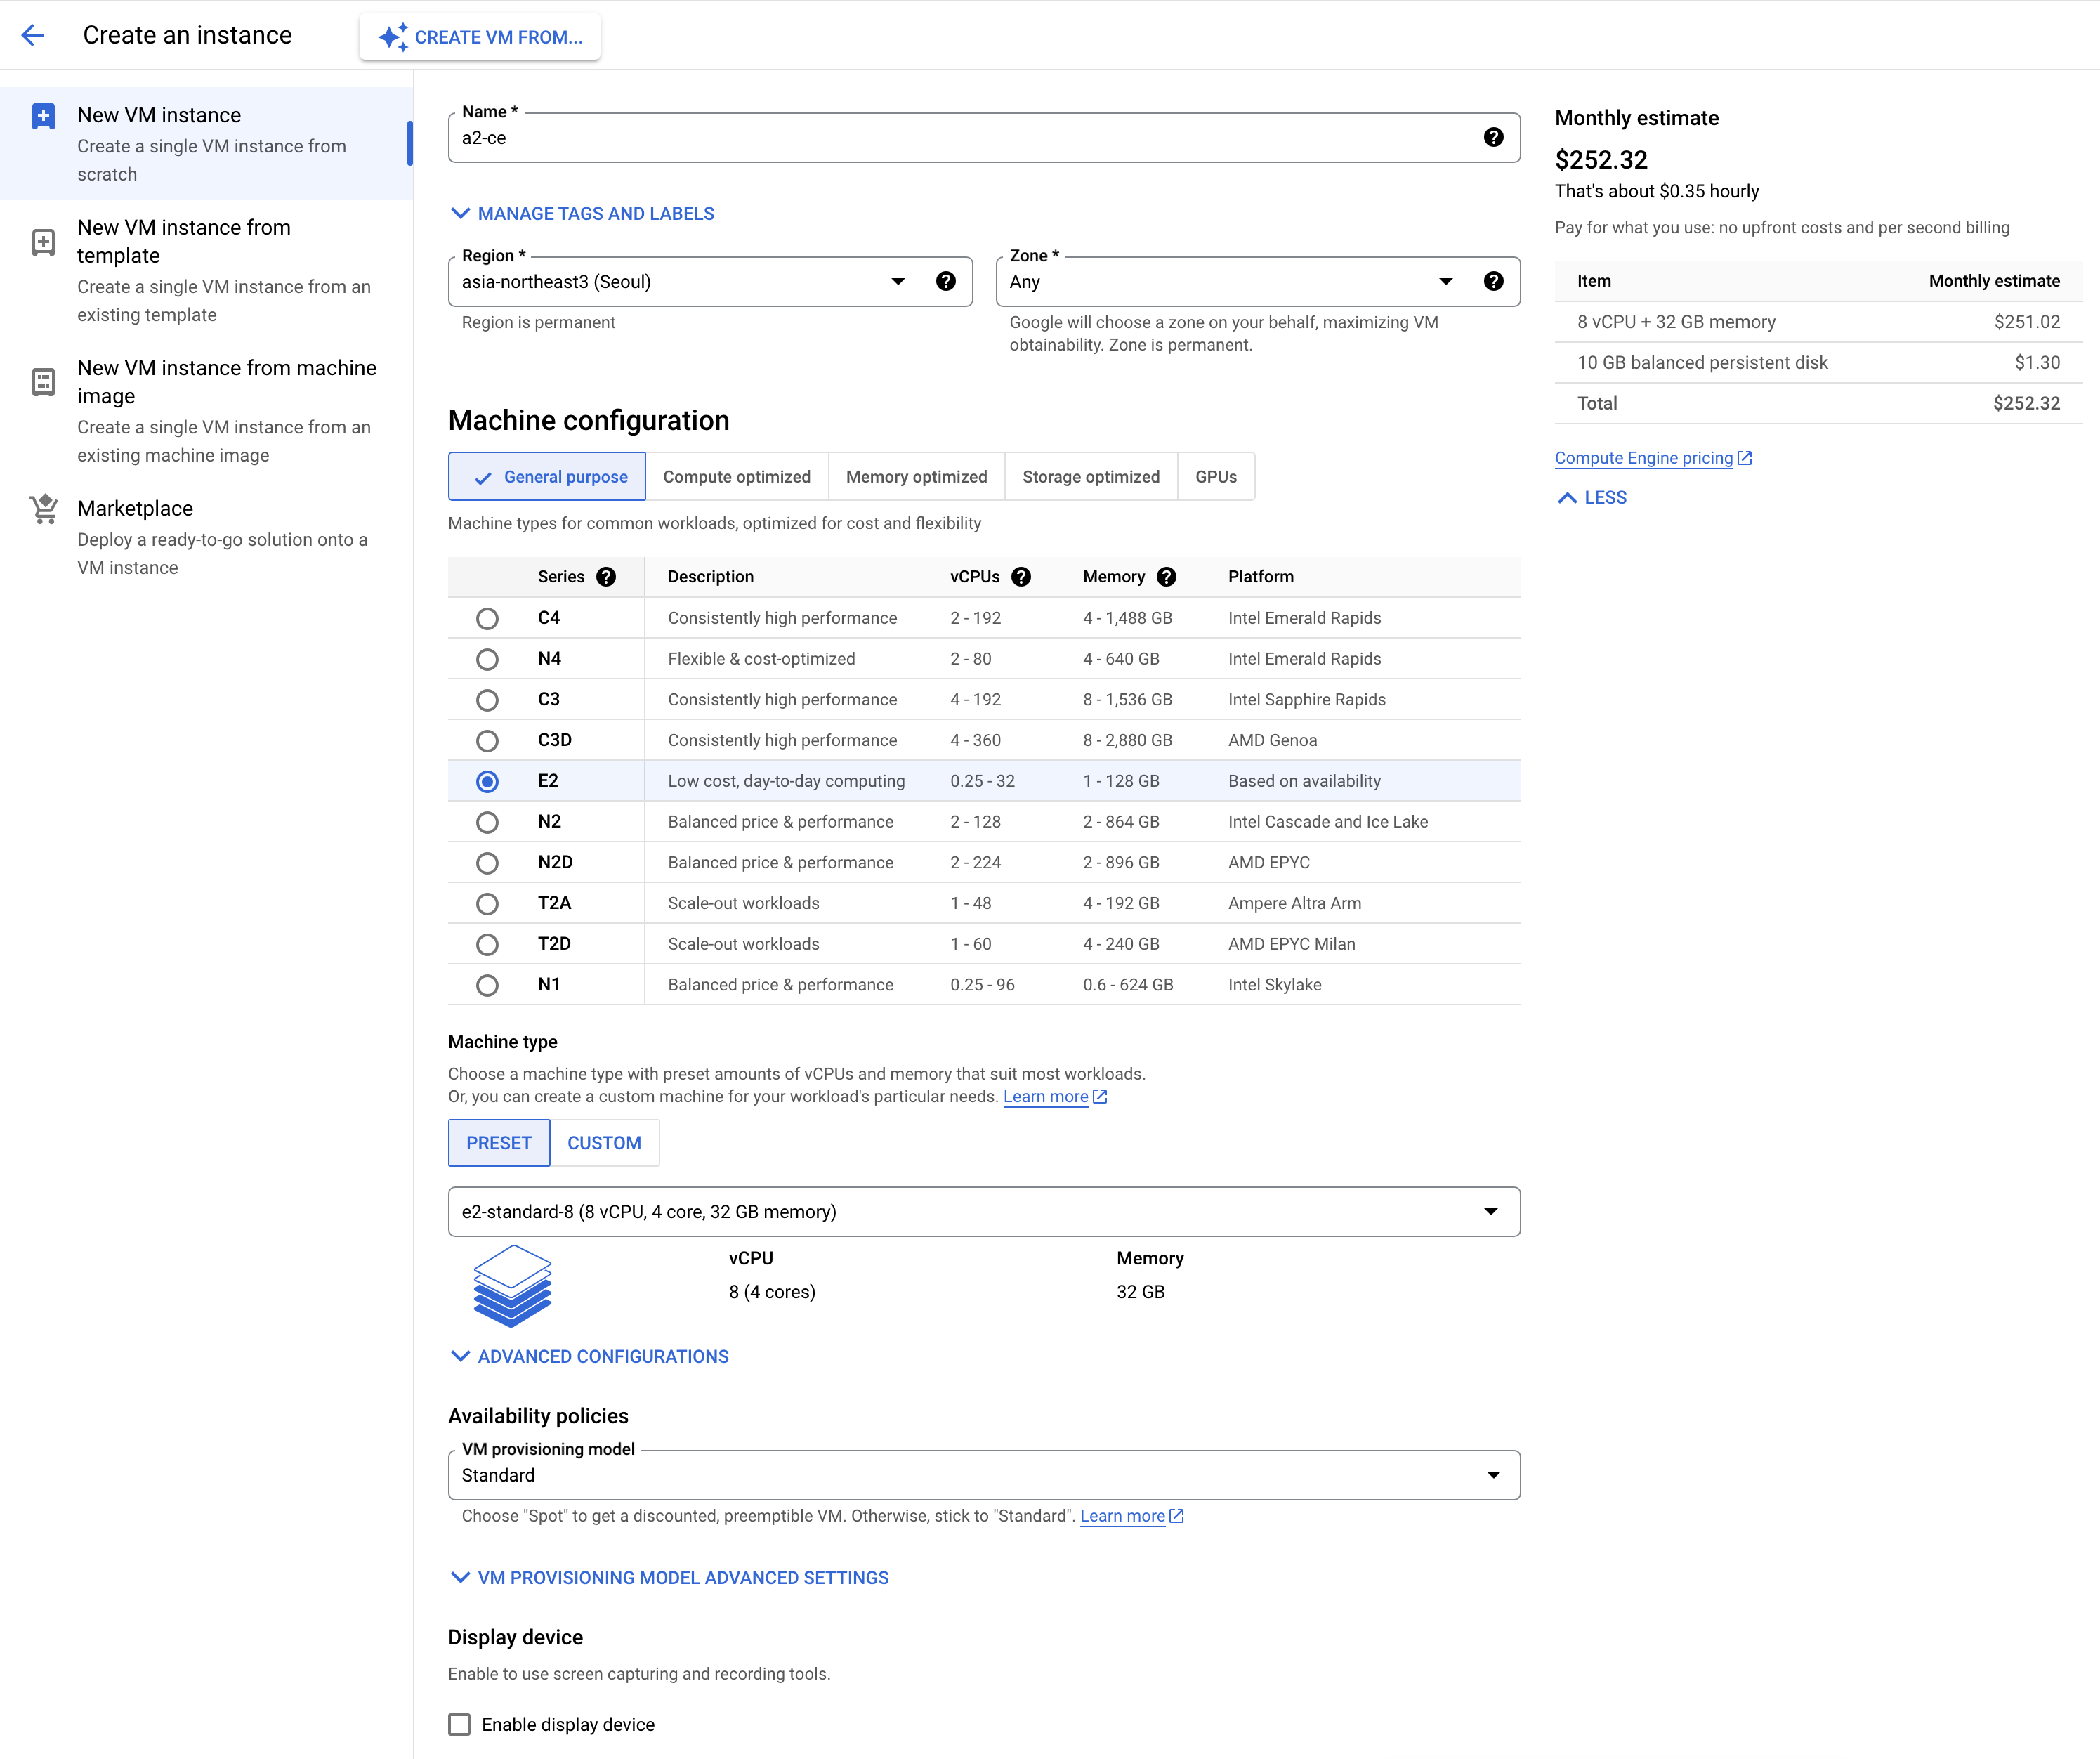
* `Name`: Instance name (e.g., "a2-ce")
* `Region`: Choose a nearby region (e.g., "asia-northeast3 (Seoul)")
* `Machine configuration` > `Machine type`:
* Recommend CPU 8 vCPU, memory 16GB or higher. (e.g., e2-standard-8)
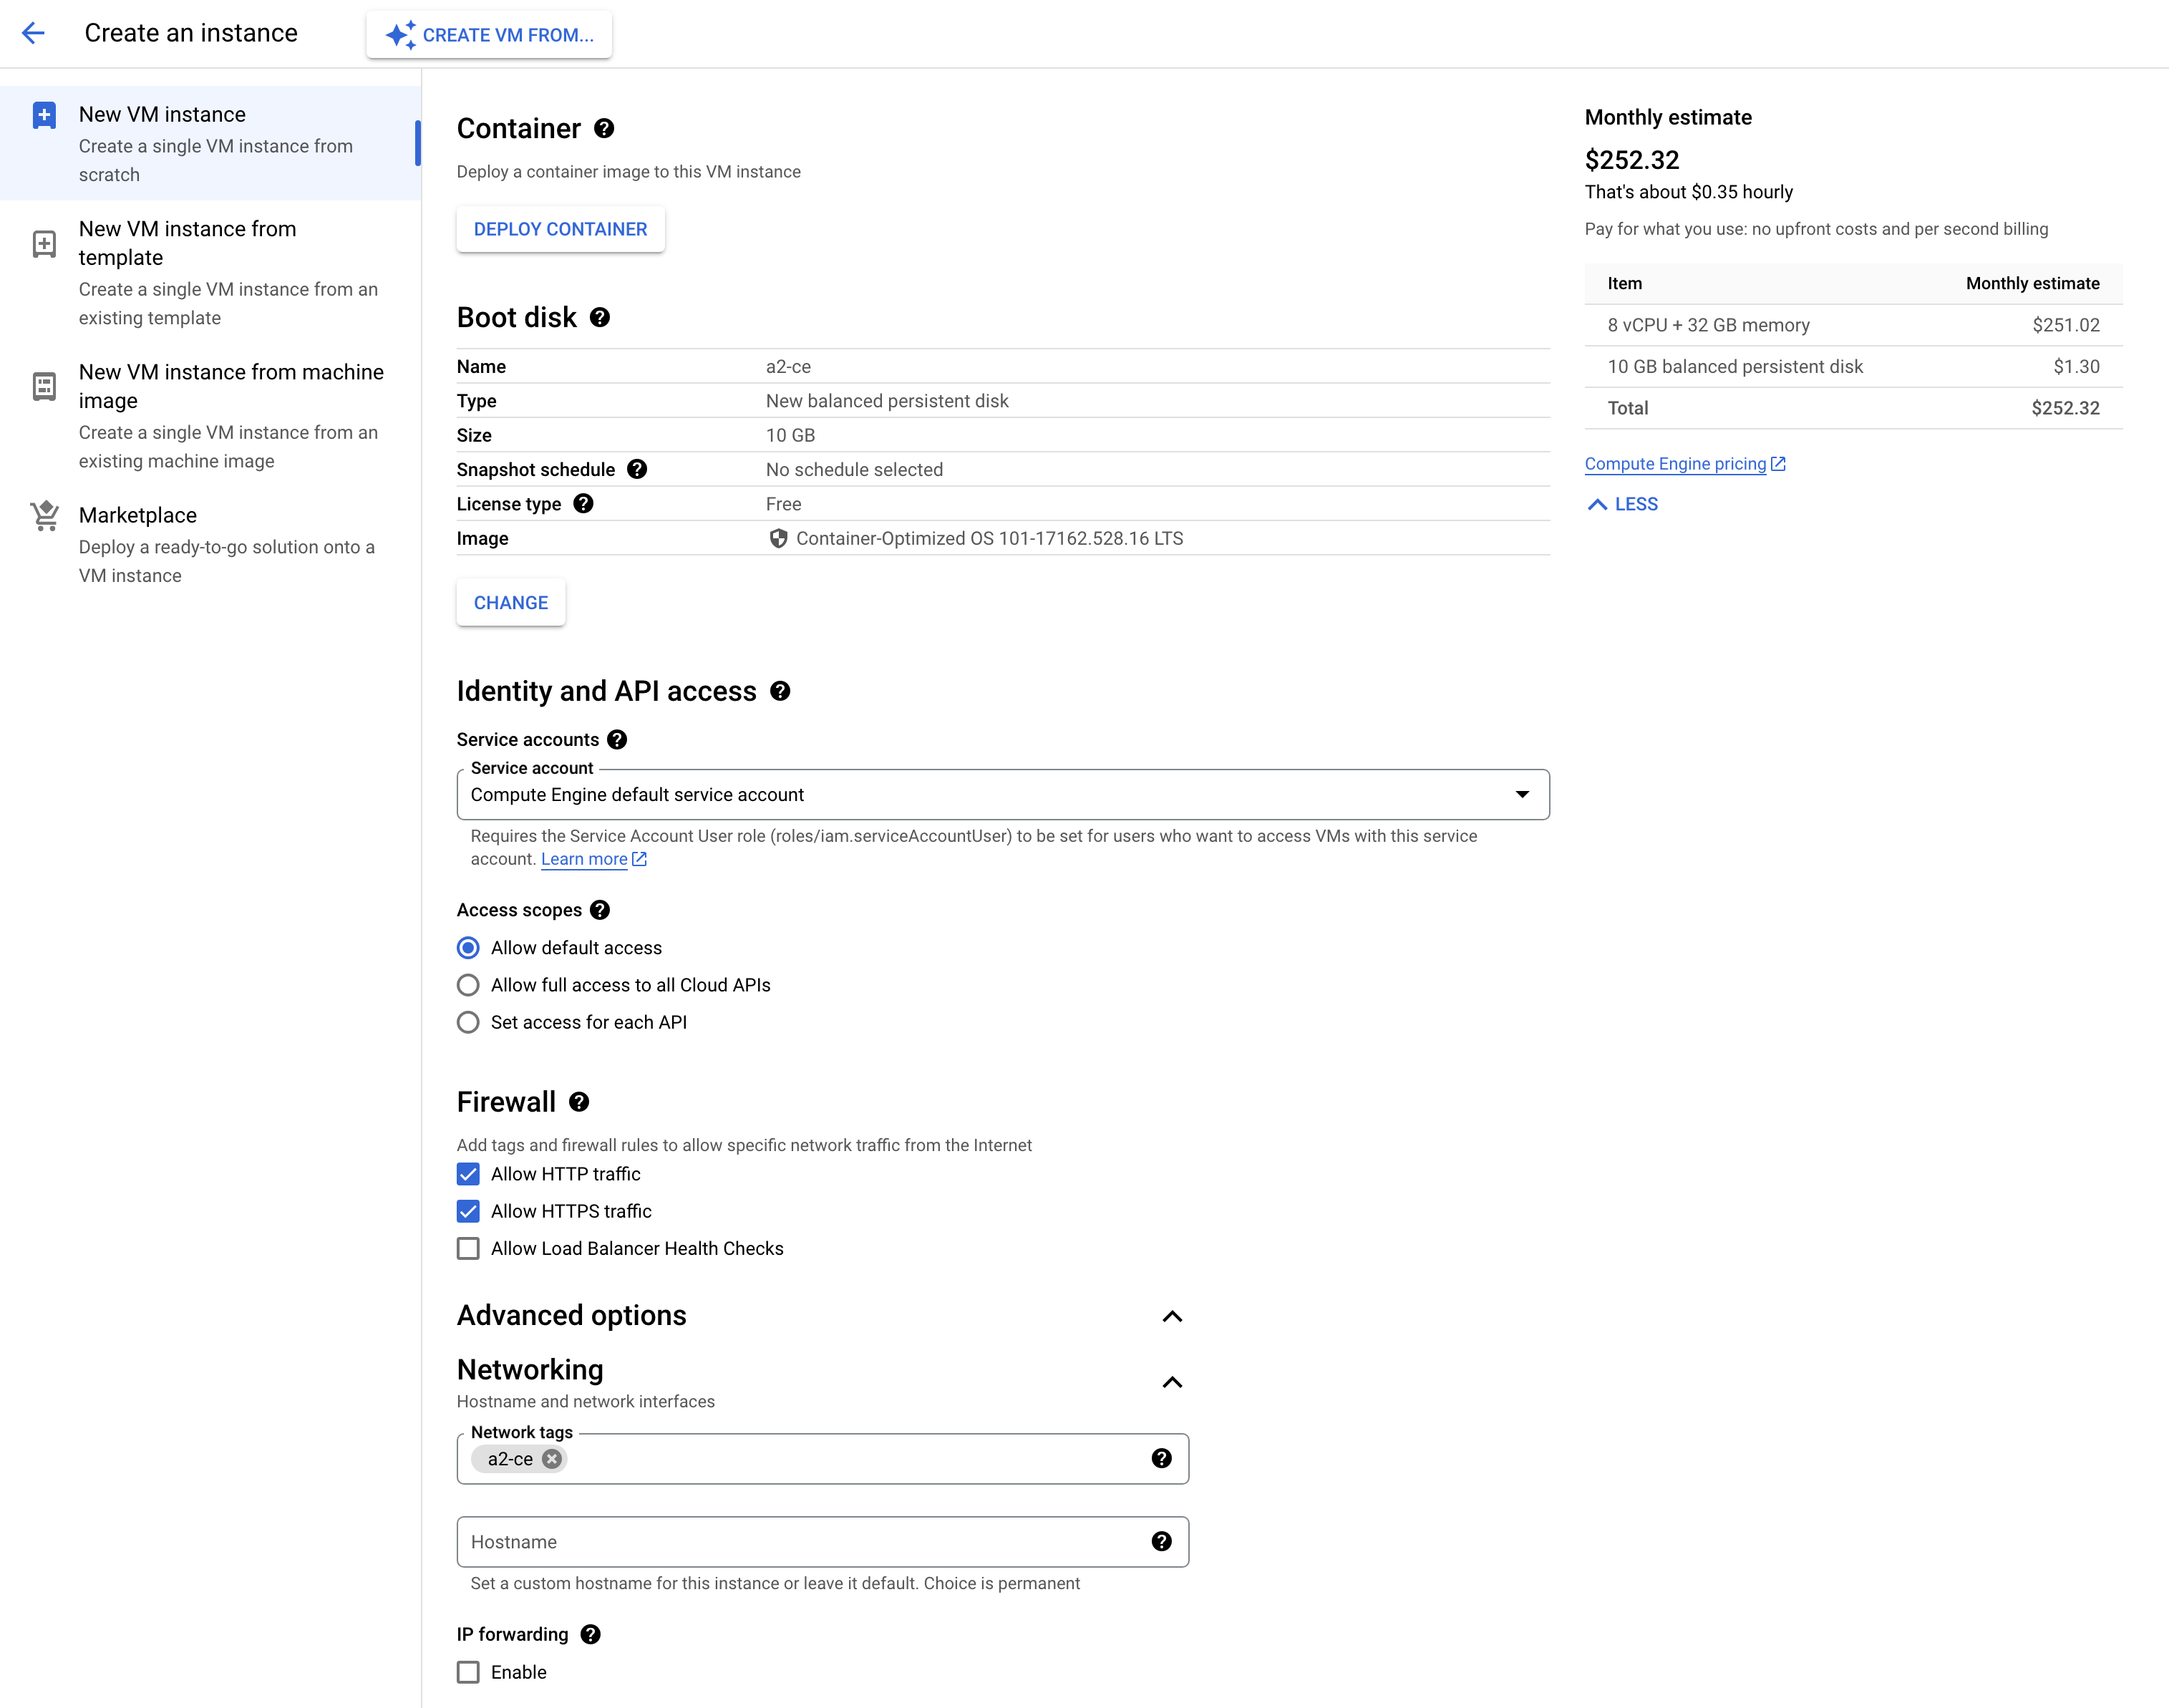
* Click the `CHANGE` button under `Boot disk`:
* `Operating system`: Select "Container Optimized OS"
* Verify that the auto-selected `Version` is "x86/64" architecture
* (optional) To preserve the disk permanently, select `Keep disk` under `SHOW ADVANCED CONFIGURATION` > `Deletion rule`
* click the `SELECT` button.
* `Firewall`: Check `Allow HTTP traffic` and `Allow HTTPS traffic`
* Expand `Advanced options`:
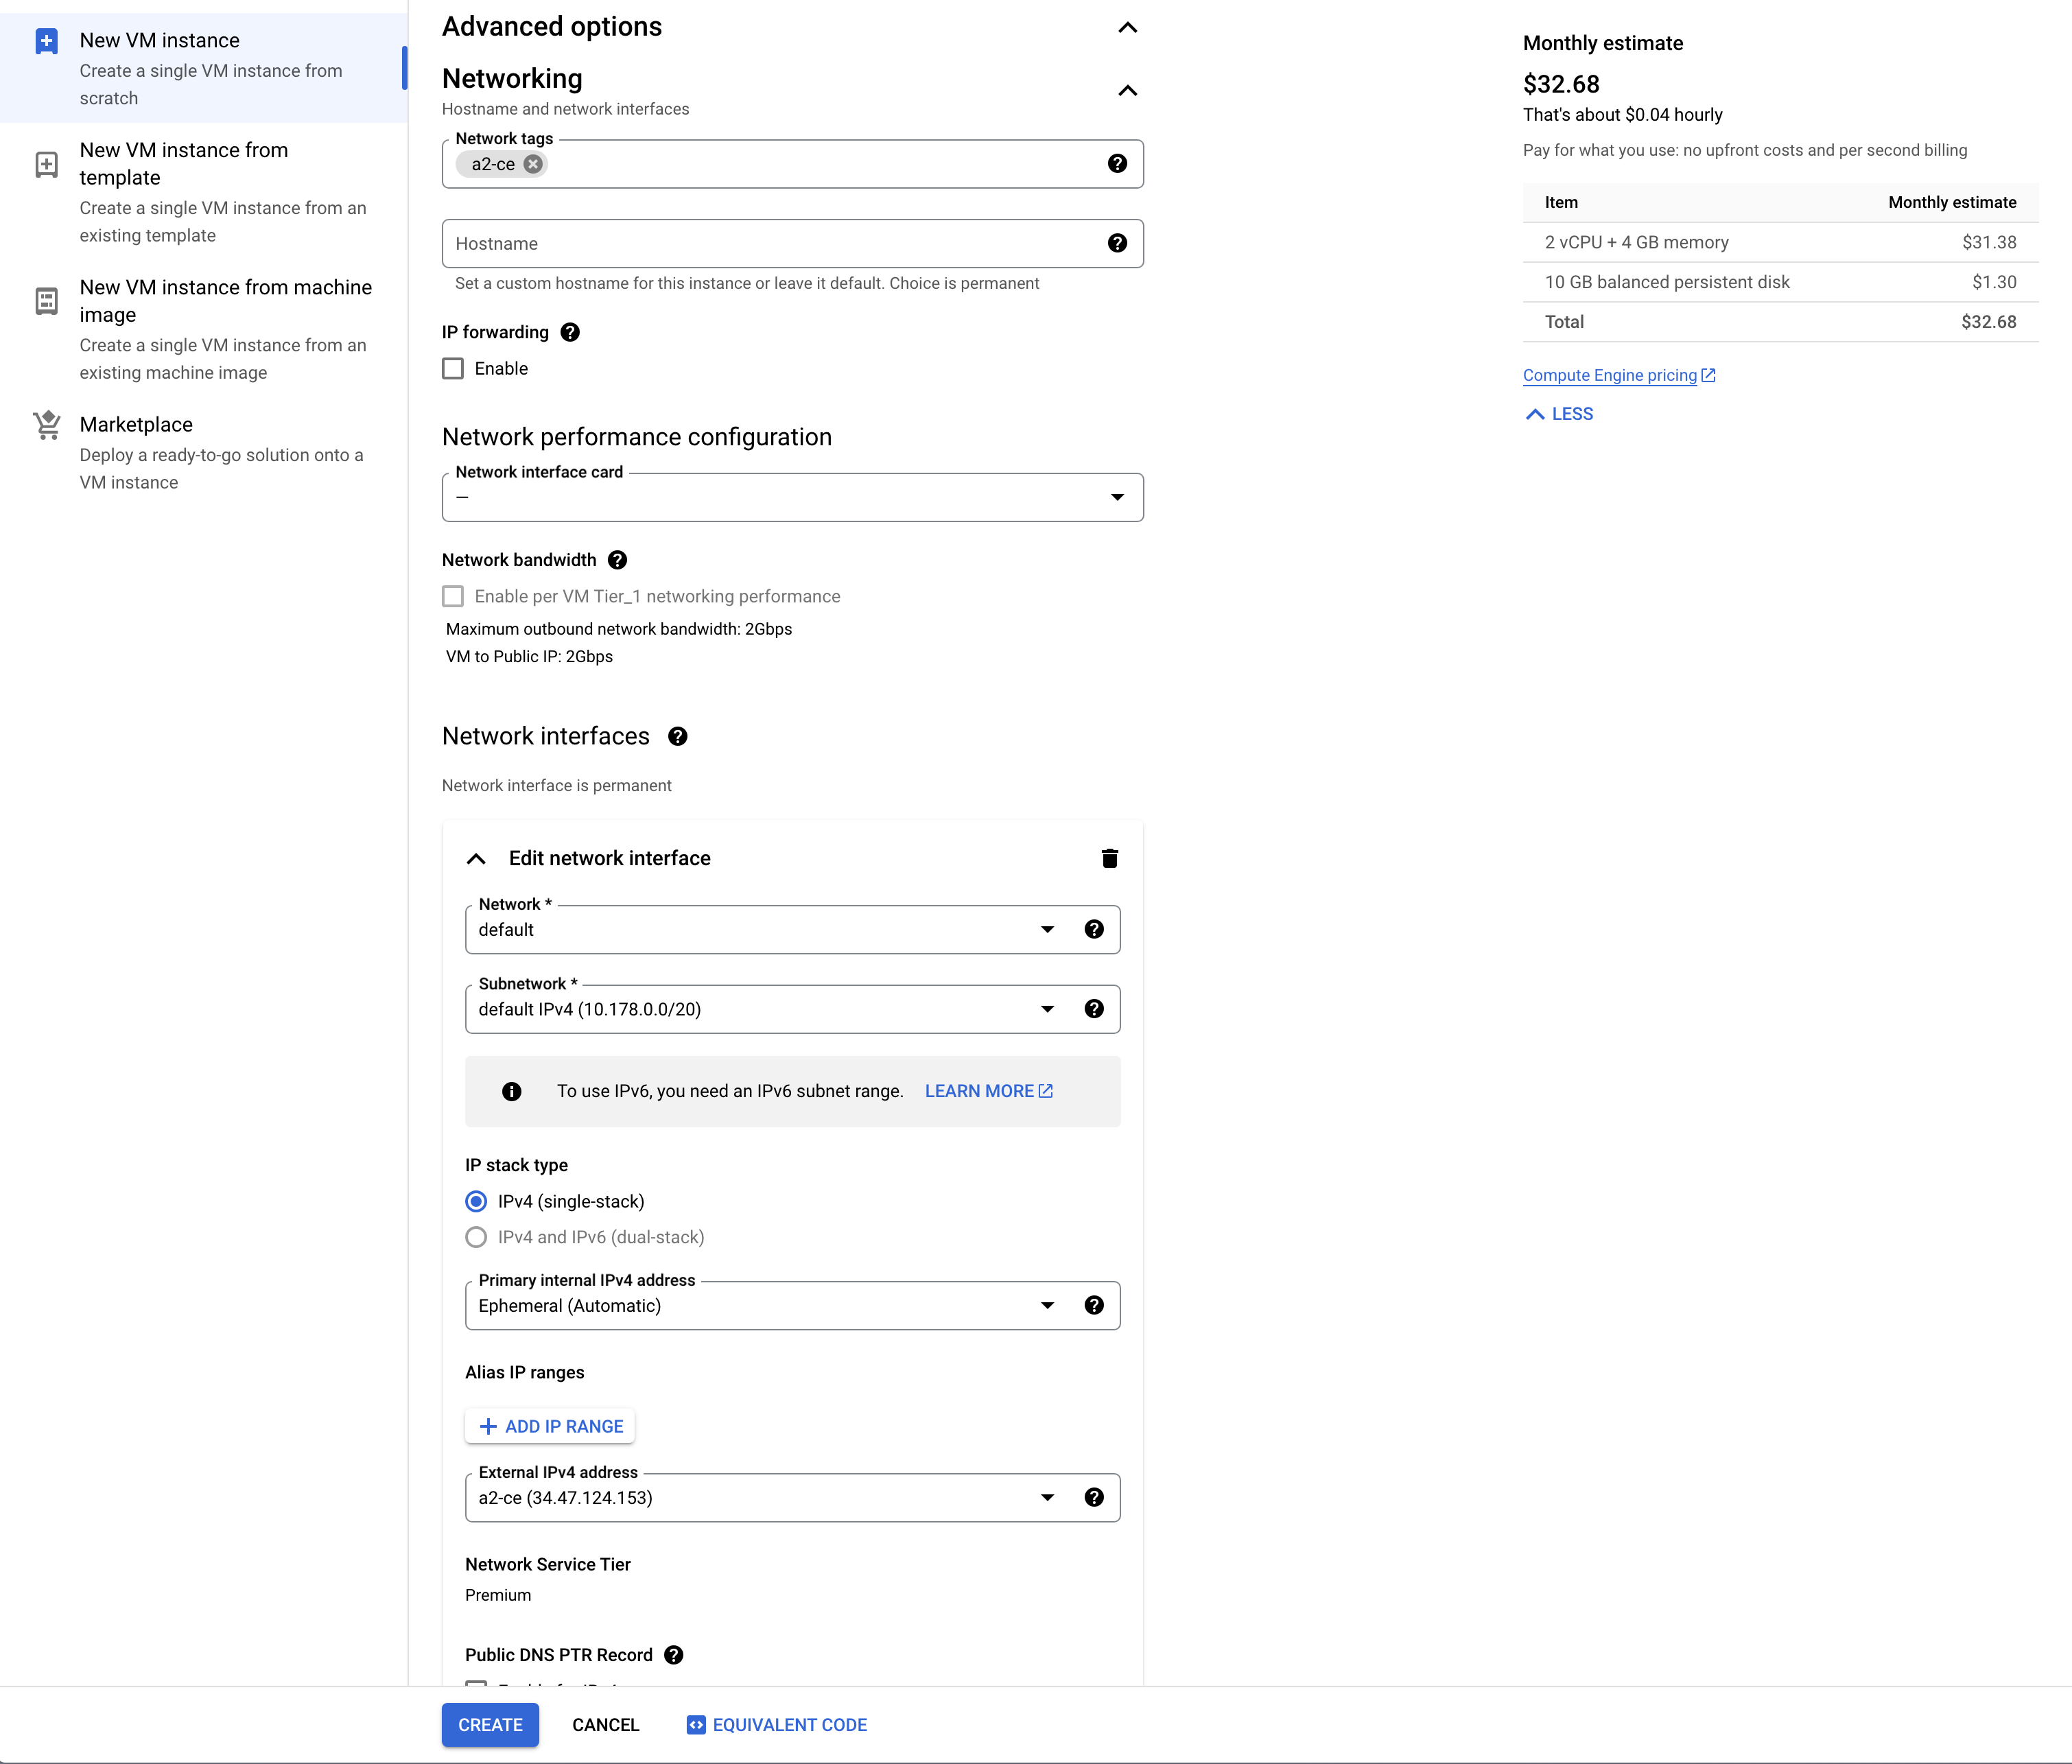
* `Networking` > `Network tags`: Enter "a2-ce"
* `Networking` > `Network interfaces` > Expand `default` > `External IPv4 address`: Select `RESERVE STATIC EXTERNAL IP ADDRESS`
* Enter "a2-ce" for `name` and click `RESERVE`
4. Click the "CREATE" button at the bottom of the screen to create the instance.
#### 3. Setting up Firewall Rules
1. Go to `VPC network` > `Firewall` menu.
2. Click the `CREATE FIREWALL RULE` button.
3. Configure the following settings:
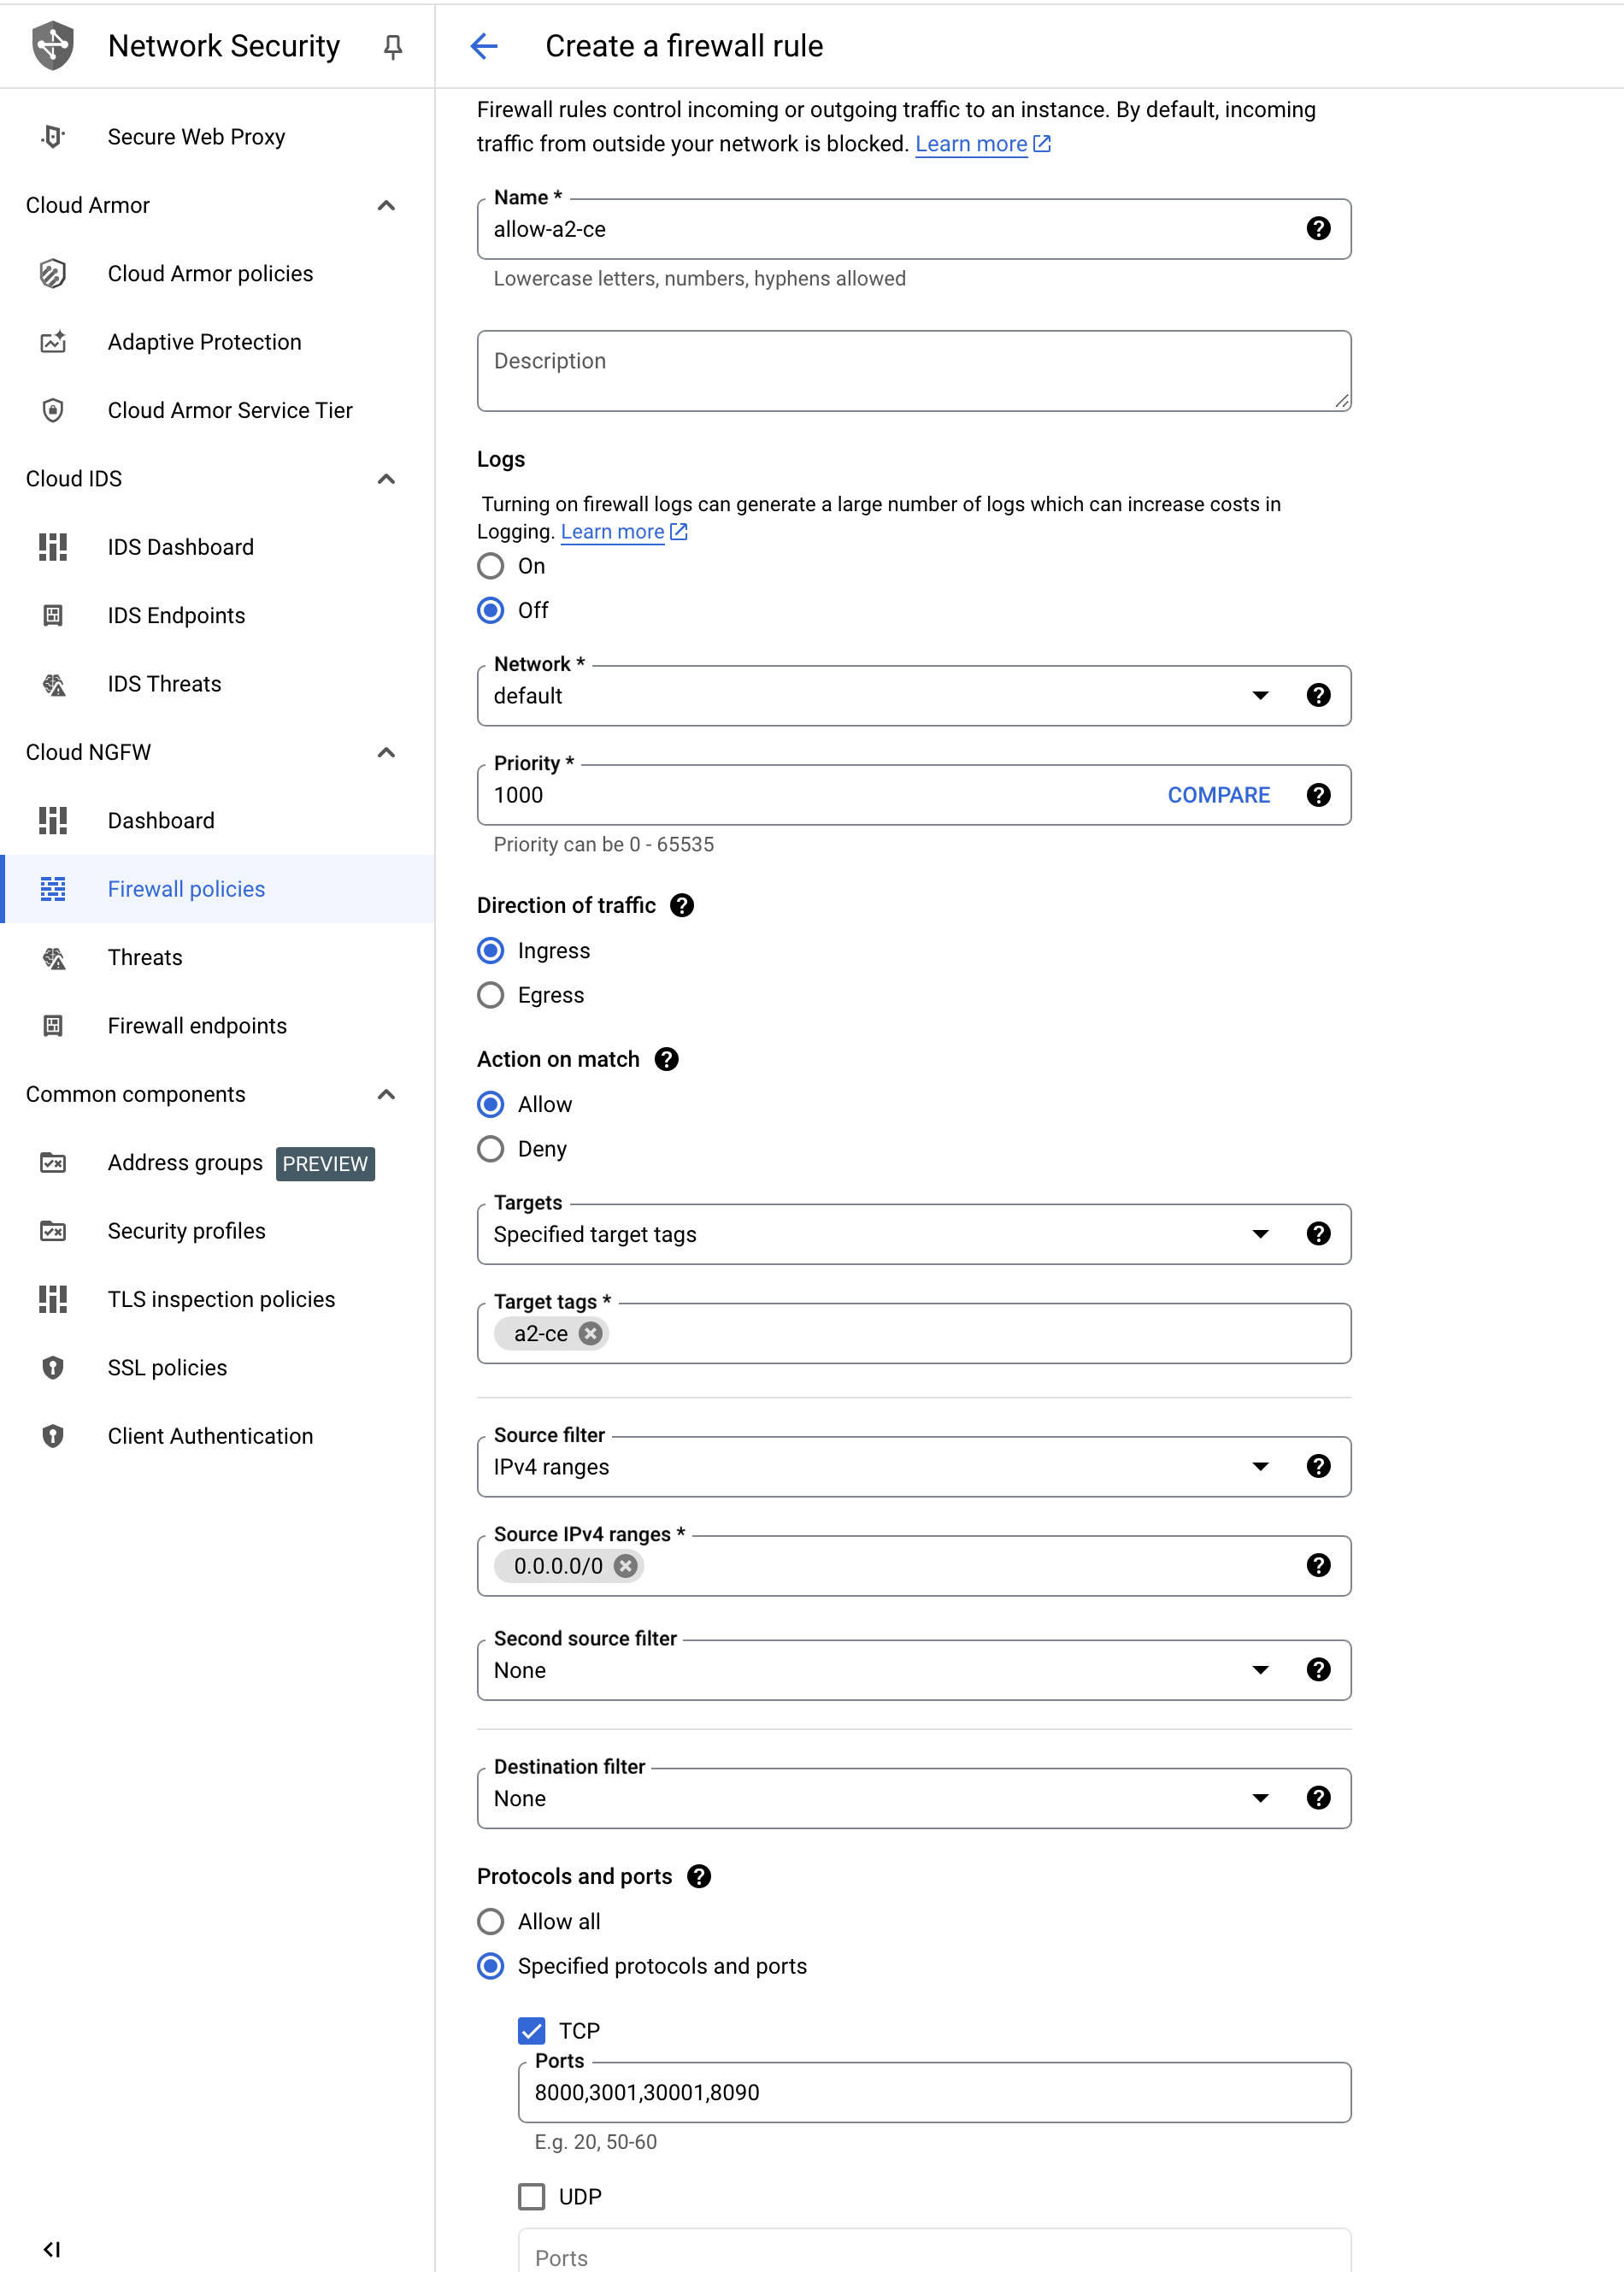
* `Name`: Specify a name for the rule (e.g., "allow-a2-ce")
* `Targets`: Select `Specified target tags` and enter the previously used tag (e.g., "a2-ce")
* `Source filter`: Select `IPv4 ranges` and enter "0.0.0.0/0" (allows access from all IPs)
* `Protocols and ports`: Select `Specified protocols and ports`, check `TCP` and enter ports **"8000,8080"**
4. Click the "CREATE" button to create the rule.
#### 4. Deploying Docker Image
1. Connect to the instance using the SSH button in the GCP console.
2. Install docker compose
```sh theme={null}
curl -s https://gist.githubusercontent.com/kurokobo/25e41503eb060fee8d8bec1dd859eff3/raw/0d7cd29472f0eaa26ce424071456ad84b24fb318/installer.sh | bash
source ~/.bashrc
docker-compose version
```
3. Create a docker-compose.yml file:
```yml theme={null}
---
services:
a2-ce:
image: { TO_BE_REPLACED }
restart: unless-stopped
logging:
options:
max-file: "1"
max-size: "512m"
volumes:
- /data:/var/a2/data
ports:
- 8000:8000
- 8080:8080
```
4. Run docker compose:
```sh theme={null}
docker compose up -d
```
#### 5. Verifying the Service
1. Open a web browser.
2. Access `http://[YOUR_STATIC_EXTERNAL_IP]:8000`.
3. Verify that the service is running normally.
### Reference Images
* settings 1
 * settings 2
 * network
 * firewall
 ***
By following this guide, you can successfully deploy A2 to GCP Compute Engine.
If you need additional configuration or optimization, please refer to the GCP documentation or contact our support team anytime.
***
By following this guide, you can successfully deploy A2 to GCP Compute Engine.
If you need additional configuration or optimization, please refer to the GCP documentation or contact our support team anytime.